
 Русский
 Polski
 Español
 ქართული
 Українська
There are two ways to connect the channel:
- Synchronization of prices and availability – listings are already created on airbnb and you only need to upload information from the system to existing listings.
- Uploading new listings from the system, where absolutely all information is uploaded from the OtelMS account, in this case it’s necessary to check all the parameters, otherwise the listings will not be published on the channel.
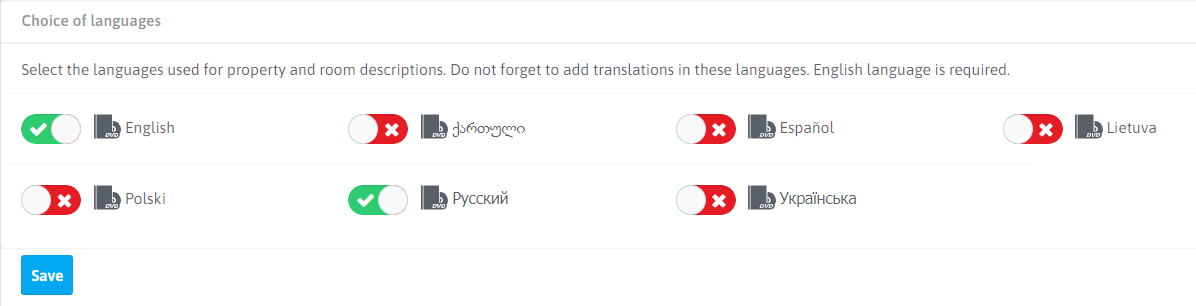
Language options
Go to the appropriate menu section by following
Select the languages in which the description of the property and its room types is filled out, which will later be available on the AirBnB website. (Note! The choice of English is required).
Global settings
Go to the appropriate menu section by following
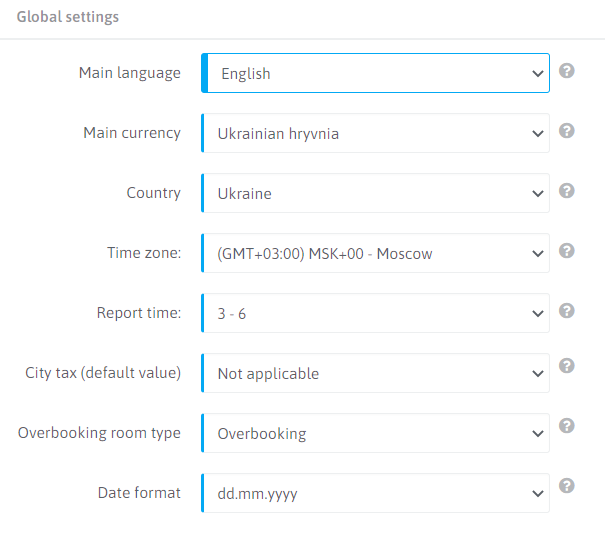
Specify the following options:
- Mail language – selected from the languages offered in paragraph 1 (the main interface language in the system for all users)
- Main currency – select the currency that will be specified in the system in the rates and uploaded to AirBnB
- Time zone – specified in the sections “Global settings” and “Basic settings”.
General information
Go to the appropriate menu section by following
If the apartments are located at different addresses, it’s necessary to create the corresponding number of properties using the function indicated by the “+” symbol
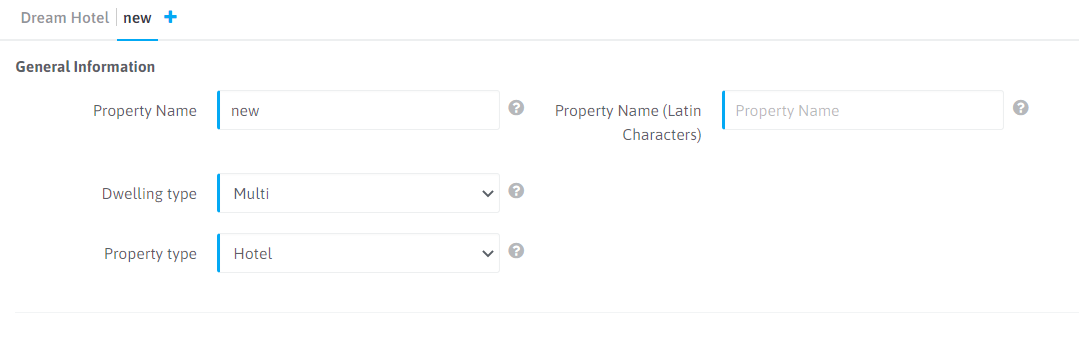
General information
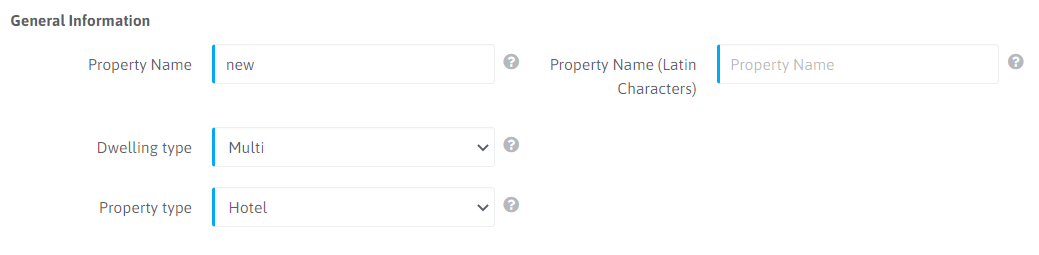
Specify the following options:
- Name — the name of the property in English (at least 8 characters);
- Dwelling type – single (house, apartment, villa, etc.); multi – (hotel, guest house, hostel, etc.);
- Property type – depends on the selected dwelling type.
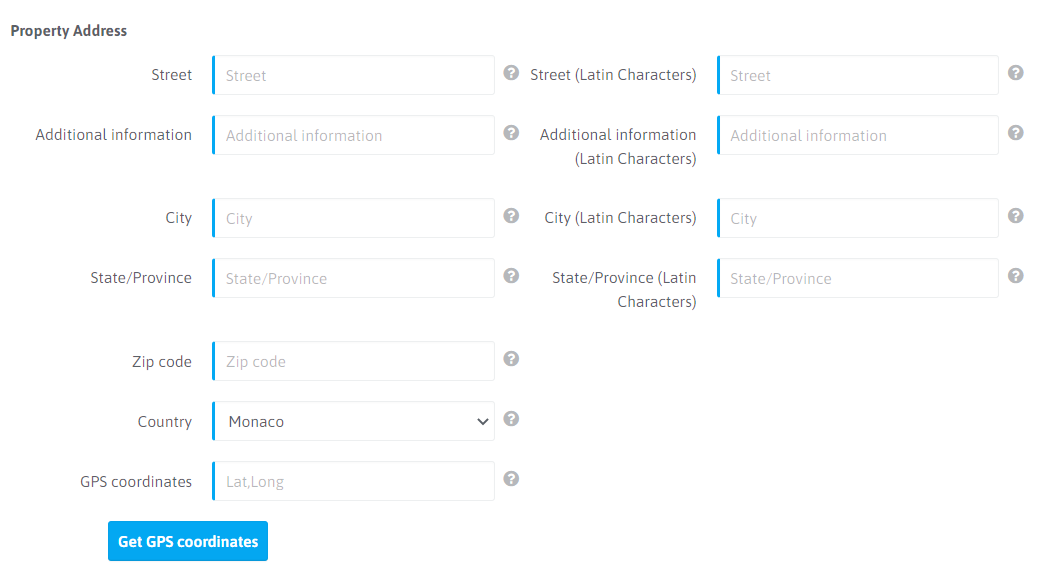
- Street – the full address of the property is indicated (Attention! The number of the building must be indicated with a comma after the street name)
- Additional information – the field is filled in in case of lack of space in the ‘Street’ column
- City – must be specified
- State/Province – must be specified
- Zip code – must be specified
- Country – must be specified
- GPS coordinates – click the
 button so that the address data is automatically generated in the required field.

- Star rating – must be specified
- Check-in time – must be specified
- Check-out time – must be specified
- Time zone – must be specified
Property Amenities
Go to the appropriate menu section by following
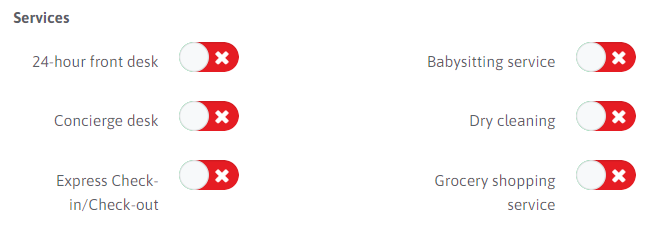
- Activate the services that the property provides (at least 5 items)
Property Photos
Go to the appropriate menu section by following
Add at least 7 photos of room types and the property as a whole (Note! The size of the photo should not exceed 5 MB. For full-scale display of photos, their aspect ratio should be 4×3, everything that is larger will be cropped. Every photo must be tagged from the list provided).
Please note that large photos may not be uploaded at the same time. For correct display you need:
- upload photos one by one;
- after each uploaded file, press the “Save” button (allowable photo size is 800×500 pixels).
Property description
Go to the appropriate menu section by following
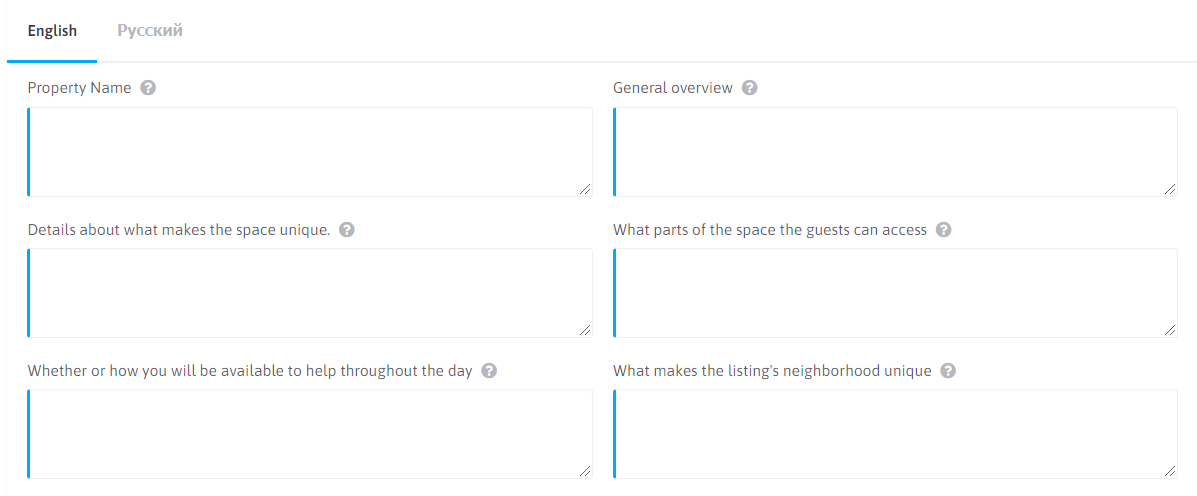
Note:
- property name in the corresponding field, must contain at least 8 characters
- property description in the general overview field must contain at least 50 characters
If the text contains an apostrophe, it must be preceded by the ““ sign.
Rooms (room types)
Go to the appropriate menu section by following
In front of the selected room type click on the “Edit” button![]()
Room type information is filled in 5 tabs:
1.Basic information
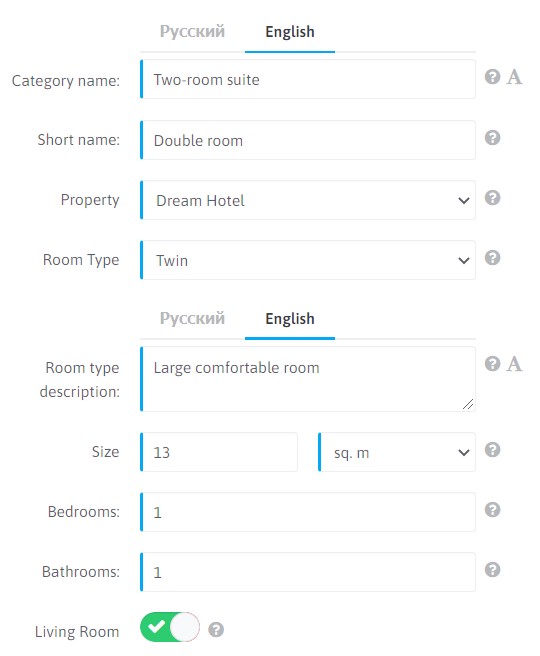
- Category name (displayed on the AirBnB channel) – must be specified
- Property – must be specified
- Room type – select from the list
- Size – must be specified
- Bedrooms – must be specified (the number of rooms is displayed in the “Occupancy” tab)
- Bathrooms – must be specified
- Base price – must be specified (you have to specify the maximum possible price that will be uploaded if there is no season in the system)
- Basic occupancy – must be specified
- Living room – is added if the apartment has more than 1 room and it is possible to accommodate guests in sleeping places (displayed in the “Occupancy” tab)
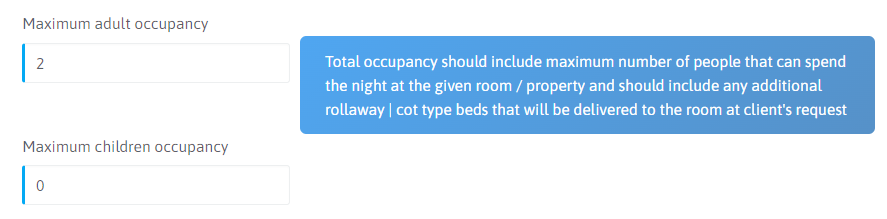
2.Occupancy
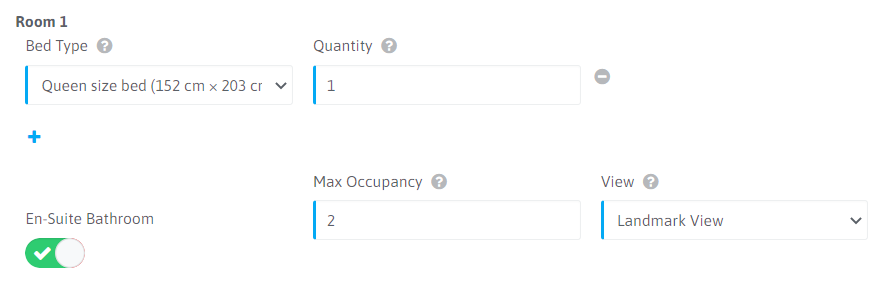
The selected bed type and their quantity; activated by pressing the + button;
Max occupancy – must be specified. If there is a shared bathroom at the room type, you have to specify this information in the “Equipment” section.
3.Equipment
Activate the required positions (at least 5)
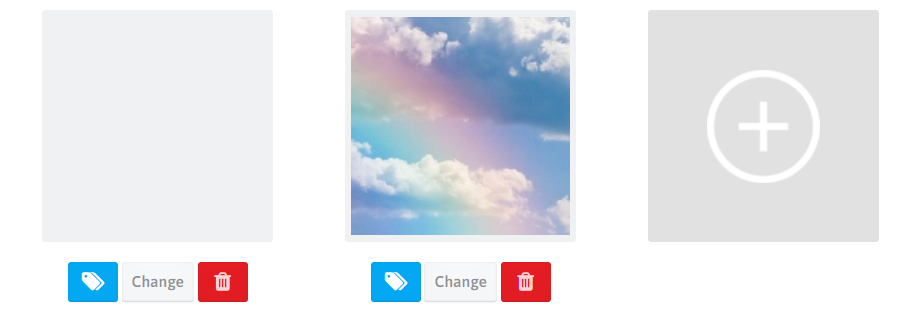
4.Photos

Add photos of room types (minimum 8). For this:
- Click on the gray square to activate more photos
- Click on the “Change” button
- Select a photo on your device (photo size should not exceed 5 MB. For full-scale display of photos, their aspect ratio must be 4×3, anything larger will be cropped)
By clicking on the “Tags” button, you can add tags to the added photo
- Click on the “Save” button at the end of the page
You have to click the “Save” button after every added photo.
After filling in all the information, you can connect to the channel.